
| Common actions | |
|---|---|
| Select column | Ctrl + Space |
| Select row | Shift + Space |
| Select all | Ctrl + a Ctrl + Shift + Space |
| Undo | Ctrl + z |
| Redo | Ctrl + y Ctrl + Shift + z F4 |
| Find | Ctrl + f |
| Find and replace | Ctrl + h |
| Fill range | Ctrl + Enter |
| Fill down | Ctrl + d |
| Fill right | Ctrl + r |
| Save (every change is saved automatically in Drive) |
Ctrl + s |
| Open | Ctrl + o |
| Ctrl + p | |
| Copy | Ctrl + c |
| Cut | Ctrl + x |
| Paste | Ctrl + v |
| Paste values only | Ctrl + Shift + v |
| Show common keyboard shortcuts | Ctrl + / |
| Insert new sheet | Shift + F11 |
| Compact controls | Ctrl + Shift + f |
| Input tools on/off (available in spreadsheets in non-Latin languages) |
Ctrl + Shift + k |
| Select input tools | Ctrl + Alt + Shift + k |
| Format cells | |
| Bold | Ctrl + b |
| Underline | Ctrl + u |
| Italic | Ctrl + i |
| Strikethrough | Alt + Shift + 5 |
| Center align | Ctrl + Shift + e |
| Left align | Ctrl + Shift + l |
| Right align | Ctrl + Shift + r |
| Apply top border | Alt + Shift + 1 |
| Apply right border | Alt + Shift + 2 |
| Apply bottom border | Alt + Shift + 3 |
| Apply left border | Alt + Shift + 4 |
| Remove borders | Alt + Shift + 6 |
| Apply outer border | Alt + Shift + 7
Ctrl + Shift + 7 |
| Insert link | Ctrl + k |
| Insert time | Ctrl + Shift + ; |
| Insert date | Ctrl + ; |
| Insert date and time | Ctrl + Alt + Shift + ; |
| Format as decimal | Ctrl + Shift + 1 |
| Format as time | Ctrl + Shift + 2 |
| Format as date | Ctrl + Shift + 3 |
| Format as currency | Ctrl + Shift + 4 |
| Format as percentage | Ctrl + Shift + 5 |
| Format as exponent | Ctrl + Shift + 6 |
| Clear formatting | Ctrl + |
| Navigate spreadsheet | |
| Move to beginning of row | Home |
| Move to beginning of sheet | Ctrl + Home |
| Move to end of row | End |
| Move to end of sheet | Ctrl + End |
| Scroll to active cell | Ctrl + Backspace |
| Move to next sheet | Ctrl + Shift + Page Down |
| Move to previous sheet | Ctrl + Shift + Page Up |
| Display list of sheets | Alt + Shift + k |
| Open hyperlink | Alt + Enter |
| Open Explore | Alt + Shift + x |
| Move focus out of spreadsheet | Ctrl + Alt + Shift + m |
| Move to quicksum (when a range of cells is selected) |
Alt + Shift + q |
| Move focus to popup (for links, bookmarks, and images) |
holding Ctrl + Alt, press e then p |
| Open drop-down menu on filtered cell | Ctrl + Alt + r |
| Open revision history | Ctrl + Alt + Shift + h |
| Open chat inside the spreadsheet | Shift + Esc |
| Close drawing editor | Shift + Esc |
| Edit notes and comments | |
| Insert/edit note | Shift + F2 |
| Insert/edit comment | Ctrl + Alt + m |
| Open comment discussion thread | Ctrl + Alt + Shift + a |
| Enter current comment | holding Ctrl + Alt, press e then c |
| Move to next comment | holding Ctrl + Alt, press n then c |
| Move to previous comment | holding Ctrl + Alt, press p then c |
| Open a menu | |
| File menu | in Google Chrome: Alt + f other browsers: Alt + Shift + f |
| Edit menu | in Google Chrome: Alt + e other browsers: Alt + Shift + e |
| View menu | in Google Chrome: Alt + v other browsers: Alt + Shift + v |
| Insert menu | in Google Chrome: Alt + i other browsers: Alt + Shift + i |
| Format menu | in Google Chrome: Alt + o other browsers: Alt + Shift + o |
| Data menu | in Google Chrome: Alt + d other browsers: Alt + Shift + d |
| Tools menu | in Google Chrome: Alt + t other browsers: Alt + Shift + t |
| Open insert menu | Ctrl + Alt + Shift + = Ctrl + Alt + = (with cells selected) |
| Open delete menu | Ctrl + Alt + – (with cells selected) |
| Form menu (present when the spreadsheet is connected to a form) |
in Google Chrome: Alt + m other browsers: Alt + Shift + m |
| Add-ons menu | in Google Chrome: Alt + n other browsers: Alt + Shift + n |
| Help menu | in Google Chrome: Alt + h other browsers: Alt + Shift + h |
| Accessibility menu (present when screen reader support is enabled) |
in Google Chrome: Alt + a other browsers: Alt + Shift + a |
| Sheet menu (copy, delete, and other sheet actions) |
Alt + Shift + s |
| Context menu | Ctrl + Shift + |
| Insert, delete, hide, or unhide rows or columns | |
| Insert rows above | Ctrl + Alt + Shift + = Ctrl + Alt + = (with rows selected)in Google Chrome: Alt + i, then r other browsers: Alt + Shift + i, then r |
| Insert rows below | in Google Chrome: Alt + i, then w other browsers: Alt + Shift + i, then w |
| Insert columns to the left | Ctrl + Alt + Shift + = Ctrl + Alt + = (with columns selected)in Google Chrome: Alt + i, then c other browsers: Alt + Shift + i, then c |
| Insert columns to the right | in Google Chrome: Alt + i, then o other browsers: Alt + Shift + i, then o |
| Delete rows | Ctrl + Alt + – (with rows selected)
in Google Chrome: Alt + e, then d |
| Delete columns | Ctrl + Alt + – (with columns selected)
in Google Chrome: Alt + e, then e |
| Hide row | Ctrl + Alt + 9 |
| Hide column | Ctrl + Alt + 0 |
| Unhide row | Ctrl + Shift + 9 |
| Unhide column | Ctrl + Shift + 0 |
| Use formulas | |
| Show all formulas | Ctrl + ~ |
| Insert array formula | Ctrl + Shift + Enter |
| Collapse an expanded array formula | Ctrl + e |
| Show/hide formula help (when entering a formula) |
Shift + F1 |
| Full/compact formula help (when entering a formula) |
F1 |
| Absolute/relative references (when entering a formula) |
F4 |
| Toggle formula result previews (when entering a formula) |
F9 |
| Resize formula bar (move up or down) |
Ctrl + Up / Ctrl + Down |
| Help for screen readers | |
| Turn on screen reader support Learn more about using Google Sheets with a screen reader |
Ctrl + Alt + z |
| Read column | Ctrl + Alt + Shift + c |
| Read row | Ctrl + Alt + Shift + r |
Month: September 2017
Saltstack and Vault integration
First install and configure vault using this tutorial:
https://apassionatechie.wordpress.com/2017/03/05/hashicorp-vault/
Use the latest version of vault.
Then install salt using the steps given here:
https://docs.saltstack.com/en/latest/topics/installation/
If you face any issues then refer these links:
https://apassionatechie.wordpress.com/2017/07/31/salt-issues/
https://apassionatechie.wordpress.com/2017/08/03/salt-stack-formulas/
Now let’s integrate vault and salt so that we can access vault secrets from inside salt state.
-
- First let’s add some key values into our vault.
vault write secret/ssh/user1 password=”abc123″
Then you can check it by reading: vault read secret/ssh/user1 - To allow salt to access your secrets you must firstly create a policy as follows:
salt-policy.hclpath "secret/*" { capabilities = ["read", "list"] } path "auth/*" { capabilities = ["read", "list","sudo","create","update","delete"] }You can also point to your secret like secret/ssh/*
We have added auth/* so that our token can create other tokens. - Then create a new policy with the following command:
vault policy-write salt-policy salt-policy.hcl - Then we will create a token from the new salt-policy
vault token-create -policy=salt-policy
Save the token created. - Then in the salt-master create a file:
/etc/salt/master.d/vault.conf with the follwoing contents:vault: url: http://127.0.0.1:8200 auth: method: token token: xxxxxx48-xxxx-xxxx-xxxx-xxxx1xxxx<span data-mce-type="bookmark" id="mce_SELREST_start" data-mce-style="overflow:hidden;line-height:0" style="overflow:hidden;line-height:0" ></span>c4a policies: - salt-policyThen create a file /etc/salt/master.d//peer_run.conf
peer_run:
    .*:
        - vault.generate_token
Then restart the salt-master with service salt-master restart
- Then execute the following command to access the secret stored in vault:
salt ‘*’ vault.read_secret “secret/ssh/user1” - To access the secret from inside jinja:
my-secret: {{ salt[‘vault’].read_secret(‘secret/ssh/user1’, ‘password’) }}
OR
{% set supersecret = salt[‘vault’].read_secret(‘secret/ssh/user1’) %}
secrets:
my_secret: {{ supersecret.password }} - If you want to access the secret as pillar then add the following in salt master configuration:
ext_pillar:
– vault: sdb_vault path=secret/ssh/user1
Restart the salt-master and salt-minion
Then access the data with the following command:
salt ‘*’ pillar.get ‘password’
Then refresh the pillar data with: salt ‘*’ saltutil.refresh_pillar - If your vault policy is not configured correctly you might get an error as:
ERROR: {‘error’: ‘Forbidden’}
2017-09-21 06:51:39,320 [salt.loaded.int.utils.vault][ERROR ][26333] Failed to get token from master! An error was returned: Forbidden
2017-09-21 06:51:39,350 [salt.pillar ][ERROR ][26333] Execption caught loading ext_pillar ‘vault’:
File “/usr/lib/python2.7/site-packages/salt/pillar/__init__.py”, line 822, in ext_pillar
key)
File “/usr/lib/python2.7/site-packages/salt/pillar/__init__.py”, line 765, in _external_pillar_data
val)
File “/usr/lib/python2.7/site-packages/salt/pillar/vault.py”, line 91, in ext_pillar
response = __utils__[‘vault.make_request’](‘GET’, url)
File “/usr/lib/python2.7/site-packages/salt/utils/vault.py”, line 124, in make_request
connection = _get_vault_connection()
File “/usr/lib/python2.7/site-packages/salt/utils/vault.py”, line 113, in _get_vault_connection
return _get_token_and_url_from_master()
File “/usr/lib/python2.7/site-packages/salt/utils/vault.py”, line 89, in _get_token_and_url_from_master
raise salt.exceptions.CommandExecutionError(result)2017-09-21 06:51:39,351 [salt.pillar ][CRITICAL][26333] Pillar render error: Failed to load ext_pillar vault: {‘error’: ‘Forbidden’}Make sure you have added auth/* in the policy.
- If you get the following error:
Failed to get token from master! No result returned – is the peer publish configuration correct?
OR
ERROR: {}
Then make sure you have peer_run.conf created and configured. - You can also access your secret with command:
salt-call sdb.get ‘sdb://vault/secret/ssh/user1?password’
- First let’s add some key values into our vault.
Hashicorp Consul Installation on Centos 7
Consul must first be installed on your machine. Consul is distributed as a binary package for all supported platforms and architectures. This page will not cover how to compile Consul from source, but compiling from source is covered in the documentation for those who want to be sure they’re compiling source they trust into the final binary.
Installing Consul
To install Consul, find the appropriate package for your system and download it. Consul is packaged as a zip archive.
After downloading Consul, unzip the package. Consul runs as a single binary named consul. Any other files in the package can be safely removed and Consul will still function.
The final step is to make sure that the consul binary is available on the PATH. See this page for instructions on setting the PATH on Linux and Mac. This page contains instructions for setting the PATH on Windows.
Verifying the Installation
After installing Consul, verify the installation worked by opening a new terminal session and checking that consul is available. By executing consul you should see help output similar to this:
$ consul
usage: consul [--version] [--help]  []

Available commands are:
    agent          Runs a Consul agent
    event          Fire a new event

# ...
If you get an error that consul could not be found, your PATH environment variable was not set up properly. Please go back and ensure that your PATH variable contains the directory where Consul was installed.
Run the Consul Agent
After Consul is installed, the agent must be run. The agent can run either in server or client mode. Each datacenter must have at least one server, though a cluster of 3 or 5 servers is recommended. A single server deployment is highlydiscouraged as data loss is inevitable in a failure scenario.
All other agents run in client mode. A client is a very lightweight process that registers services, runs health checks, and forwards queries to servers. The agent must be running on every node that is part of the cluster.
For more detail on bootstrapping a datacenter, see this guide.
Starting the Agent
For simplicity, we’ll start the Consul agent in development mode for now. This mode is useful for bringing up a single-node Consul environment quickly and easily. It is not intended to be used in production as it does not persist any state.
-$ consul agent -dev
==> Starting Consul agent...
==> Starting Consul agent RPC...
==> Consul agent running!
           Version: 'v0.7.0'
         Node name: 'Armons-MacBook-Air'
        Datacenter: 'dc1'
            Server: true (bootstrap: false)
       Client Addr: 127.0.0.1 (HTTP: 8500, HTTPS: -1, DNS: 8600, RPC: 8400)
      Cluster Addr: 127.0.0.1 (LAN: 8301, WAN: 8302)
    Gossip encrypt: false, RPC-TLS: false, TLS-Incoming: false
             Atlas:

==> Log data will now stream in as it occurs:

    2016/09/15 10:21:10 [INFO] raft: Initial configuration (index=1): [{Suffrage:Voter ID:127.0.0.1:8300 Address:127.0.0.1:8300}]
    2016/09/15 10:21:10 [INFO] raft: Node at 127.0.0.1:8300 [Follower] entering Follower state (Leader: "")
    2016/09/15 10:21:10 [INFO] serf: EventMemberJoin: Armons-MacBook-Air 127.0.0.1
    2016/09/15 10:21:10 [INFO] serf: EventMemberJoin: Armons-MacBook-Air.dc1 127.0.0.1
    2016/09/15 10:21:10 [INFO] consul: Adding LAN server Armons-MacBook-Air (Addr: tcp/127.0.0.1:8300) (DC: dc1)
    2016/09/15 10:21:10 [INFO] consul: Adding WAN server Armons-MacBook-Air.dc1 (Addr: tcp/127.0.0.1:8300) (DC: dc1)
    2016/09/15 10:21:13 [DEBUG] http: Request GET /v1/agent/services (180.708µs) from=127.0.0.1:52369
    2016/09/15 10:21:13 [DEBUG] http: Request GET /v1/agent/services (15.548µs) from=127.0.0.1:52369
    2016/09/15 10:21:17 [WARN] raft: Heartbeat timeout from "" reached, starting election
    2016/09/15 10:21:17 [INFO] raft: Node at 127.0.0.1:8300 [Candidate] entering Candidate state in term 2
    2016/09/15 10:21:17 [DEBUG] raft: Votes needed: 1
    2016/09/15 10:21:17 [DEBUG] raft: Vote granted from 127.0.0.1:8300 in term 2. Tally: 1
    2016/09/15 10:21:17 [INFO] raft: Election won. Tally: 1
    2016/09/15 10:21:17 [INFO] raft: Node at 127.0.0.1:8300 [Leader] entering Leader state
    2016/09/15 10:21:17 [INFO] consul: cluster leadership acquired
    2016/09/15 10:21:17 [DEBUG] consul: reset tombstone GC to index 3
    2016/09/15 10:21:17 [INFO] consul: New leader elected: Armons-MacBook-Air
    2016/09/15 10:21:17 [INFO] consul: member 'Armons-MacBook-Air' joined, marking health alive
    2016/09/15 10:21:17 [INFO] agent: Synced service 'consul'
As you can see, the Consul agent has started and has output some log data. From the log data, you can see that our agent is running in server mode and has claimed leadership of the cluster. Additionally, the local member has been marked as a healthy member of the cluster.
You can start the consul in the server mode by executing the following command:
consul agent -data-dir=/opt/consul/data -bind=192.168.1.15 -server -bootstrap-expect 1 -ui -client 0.0.0.0 &
-data-dir – This flag provides a data directory for the agent to store state. This is required for all agents. The directory should be durable across reboots. This is especially critical for agents that are running in server mode as they must be able to persist cluster state.
-bind – The address that should be bound to for internal cluster communications. This is an IP address that should be reachable by all other nodes in the cluster. By default, this is “0.0.0.0”, meaning Consul will bind to all addresses on the local machine and will advertise the first available private IPv4 address to the rest of the cluster. If there are multiple private IPv4 addresses available, Consul will exit with an error at startup.
-server – This flag is used to control if an agent is in server or client mode. When provided, an agent will act as a Consul server.
-bootstrap-expect – This flag provides the number of expected servers in the datacenter. Either this value should not be provided or the value must agree with other servers in the cluster. When provided, Consul waits until the specified number of servers are available and then bootstraps the cluster.
-ui – Enables the built-in web UI server and the required HTTP routes. This eliminates the need to maintain the Consul web UI files separately from the binary.
-client – The address to which Consul will bind client interfaces, including the HTTP and DNS servers. By default, this is “127.0.0.1”, allowing only loopback connections.
Now you can access the ui by hitting the following in the browser:
http://{IP_of_consul_server}:8500/ui
You can create a configuration file as follows if you do not want to use the command line args to start consul:
Create a file /etc/consul/consul.json with the following content:
{
  "data_dir": "/opt/consul/data",
  "server": true,
  "bind_addr": "192.168.1.15",
  "bootstrap_expect": 1,
  "ui": true,
  "client_addr": "0.0.0.0"
}
Then start consul with:
consul agent -config-file=/etc/consul/consul.json &
Thus we have installed and configured consul.
If you want to configure vault with consul then you can use the following hcl:
storage “consul” {
address = “192.168.1.15:8500”
path = “vault”
}
listener “tcp” {
address = “0.0.0.0:8200”
tls_disable = 1
}
Chef: Overview
Chef is a powerful automation platform that transforms infrastructure into code. Whether you’re operating in the cloud, on-premises, or in a hybrid environment, Chef automates how infrastructure is configured, deployed, and managed across your network, no matter its size.
This diagram shows how you develop, test, and deploy your Chef code.

-
The workstation is the location from which users interact with Chef. On the workstation users author and test cookbooks using tools such as Test Kitchen and interact with the Chef server using the knife and chefcommand line tools.
-
Nodes are the machines—physical, virtual, cloud, and so on—that are under management by Chef. The chef-client is installed on each node and is what performs the automation on that machine.
-
Use the Chef server as your foundation to create and manage flexible, dynamic infrastructure whether you manage 50 or 500,000 nodes, across multiple datacenters, public and private clouds, and in heterogeneous environments.
The Chef server acts as a hub for configuration data. The Chef server stores cookbooks, the policies that are applied to nodes, and metadata that describes each registered node that is being managed by the chef-client. Nodes use the chef-client to ask the Chef server for configuration details, such as recipes, templates, and file distributions. The chef-client then does as much of the configuration work as possible on the nodes themselves (and not on the Chef server). This scalable approach distributes the configuration effort throughout the organization.
Chef Components
The following diagram shows the relationships between the various elements of Chef, including the nodes, the server, and the workstation. These elements work together to provide the chef-client the information and instruction that it needs so that it can do its job. As you are reviewing the rest of this topic, use the icons in the tables to refer back to this image.

Chef has the following major components:
| Component | Description |
|---|---|
|
|
One (or more) workstations are configured to allow users to author, test, and maintain cookbooks. Cookbooks are uploaded to the Chef server from the workstation. Some cookbooks are custom to the organization and others are based on community cookbooks available from the Chef Supermarket. Ruby is the programming language that is the authoring syntax for cookbooks. Most recipes are simple patterns (blocks that define properties and values that map to specific configuration items like packages, files, services, templates, and users). The full power of Ruby is available for when you need a programming language. Often, a workstation is configured to use the Chef Development Kit as the development toolkit. The Chef Development Kit is a package from Chef that provides a recommended set of tooling, including Chef itself, the chef command line tool, Test Kitchen, ChefSpec, Berkshelf, and more. |
|
|
A node is any machine—physical, virtual, cloud, network device, etc.—that is under management by Chef. A chef-client is installed on every node that is under management by Chef. The chef-client performs all of the configuration tasks that are specified by the run-list and will pull down any required configuration data from the Chef server as it is needed during the chef-client run. |
|
|
The Chef server acts as a hub of information. Cookbooks and policy settings are uploaded to the Chef server by users from workstations. (Policy settings may also be maintained from the Chef server itself, via the Chef management console web user interface.) The chef-client accesses the Chef server from the node on which it’s installed to get configuration data, performs searches of historical chef-client run data, and then pulls down the necessary configuration data. After the chef-client run is finished, the chef-client uploads updated run data to the Chef server. Chef management console is the user interface for the Chef server. It is used to manage data bags, attributes, run-lists, roles, environments, and cookbooks, and also to configure role-based access for users and groups. |
|
|
Chef Supermarket is the location in which community cookbooks are shared and managed. Cookbooks that are part of the Chef Supermarket may be used by any Chef user. How community cookbooks are used varies from organization to organization. |
Chef management console, chef-client run reporting, high availability configurations, and Chef server replication are available as part of Chef Automate.
The following sections discuss these elements (and their various components) in more detail.
Workstations
A workstation is a computer running the Chef Development Kit (ChefDK) that is used to author cookbooks, interact with the Chef server, and interact with nodes.
The workstation is the location from which most users do most of their work, including:
- Developing and testing cookbooks and recipes
- Testing Chef code
- Keeping the chef-repo synchronized with version source control
- Configuring organizational policy, including defining roles and environments, and ensuring that critical data is stored in data bags
- Interacting with nodes, as (or when) required, such as performing a bootstrap operation
The Chef Development Kit tooling encourages integration and unit testing, and defines workflow around cookbook authoring and policy, but it’s important to note that you know best about how your infrastructure should be put together. Therefore, Chef makes as few decisions on its own as possible. When a decision must be made tools uses a reasonable default setting that can be easily changed. While Chef encourages the use of the tooling packaged in the Chef DK, none of these tools should be seen as a requirement or pre-requisite for being successful using Chef.
Workstation Components and Tools
Some important tools and components of Chef workstations include:
| Component | Description |
|---|---|
|
|
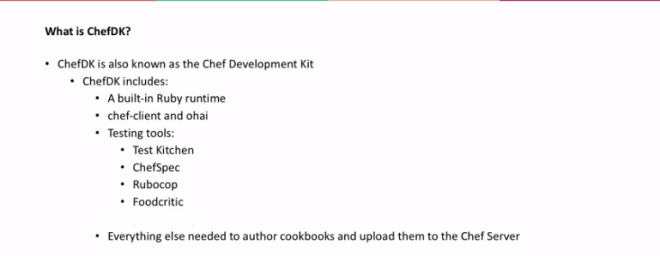
The Chef Development Kit is a package that contains everything that is needed to start using Chef:
|
|
|
ChefDK includes two important command-line tools:
|
|
|
The chef-repo is the repository structure in which cookbooks are authored, tested, and maintained:
The directory structure within the chef-repo varies. Some organizations prefer to keep all of their cookbooks in a single chef-repo, while other organizations prefer to use a chef-repo for every cookbook. |
|
|
Use Test Kitchen to automatically test cookbook data across any combination of platforms and test suites:
|
|
|
Use ChefSpec to simulate the convergence of resources on a node:
|
Cookbooks
A cookbook is the fundamental unit of configuration and policy distribution. A cookbook defines a scenario and contains everything that is required to support that scenario:
- Recipes that specify the resources to use and the order in which they are to be applied
- Attribute values
- File distributions
- Templates
- Extensions to Chef, such as custom resources and libraries
The chef-client uses Ruby as its reference language for creating cookbooks and defining recipes, with an extended DSL for specific resources. A reasonable set of resources are available to the chef-client, enough to support many of the most common infrastructure automation scenarios; however, this DSL can also be extended when additional resources and capabilities are required.
Components
Cookbooks are comprised of the following components:
| Component | Description |
|---|---|
|
|
An attribute can be defined in a cookbook (or a recipe) and then used to override the default settings on a node. When a cookbook is loaded during a chef-client run, these attributes are compared to the attributes that are already present on the node. Attributes that are defined in attribute files are first loaded according to cookbook order. For each cookbook, attributes in the default.rb file are loaded first, and then additional attribute files (if present) are loaded in lexical sort order. When the cookbook attributes take precedence over the default attributes, the chef-client will apply those new settings and values during the chef-client run on the node. |
|
|
Use the cookbook_file resource to transfer files from a sub-directory of COOKBOOK_NAME/files/ to a specified path located on a host that is running the chef-client. The file is selected according to file specificity, which allows different source files to be used based on the hostname, host platform (operating system, distro, or as appropriate), or platform version. Files that are located in the COOKBOOK_NAME/files/default sub-directory may be used on any platform. |
|
|
A library allows arbitrary Ruby code to be included in a cookbook, either as a way of extending the classes that are built-in to the chef-client—Chef::Recipe, for example—or for implementing entirely new functionality, similar to a mixin in Ruby. A library file is a Ruby file that is located within a cookbook’s /libraries directory. Because a library is built using Ruby, anything that can be done with Ruby can be done in a library file. |
|
|
Every cookbook requires a small amount of metadata. A file named metadata.rb is located at the top of every cookbook directory structure. The contents of the metadata.rb file provides hints to the Chef server to help ensure that cookbooks are deployed to each node correctly. |
|
|
A recipe is the most fundamental configuration element within the organization. A recipe:
The chef-client will run a recipe only when asked. When the chef-client runs the same recipe more than once, the results will be the same system state each time. When a recipe is run against a system, but nothing has changed on either the system or in the recipe, the chef-client won’t change anything. The Recipe DSL is a Ruby DSL that is primarily used to declare resources from within a recipe. The Recipe DSL also helps ensure that recipes interact with nodes (and node properties) in the desired manner. Most of the methods in the Recipe DSL are used to find a specific parameter and then tell the chef-client what action(s) to take, based on whether that parameter is present on a node. |
|
|
A resource is a statement of configuration policy that:
Chef has many built-in resources that cover all of the most common actions across all of the most common platforms. You can build your own resources to handle any situation that isn’t covered by a built-in resource. |
|
|
A cookbook template is an Embedded Ruby (ERB) template that is used to dynamically generate static text files. Templates may contain Ruby expressions and statements, and are a great way to manage configuration files. Use the template resource to add cookbook templates to recipes; place the corresponding Embedded Ruby (ERB) template file in a cookbook’s /templates directory. |
|
|
Testing cookbooks improves the quality of those cookbooks by ensuring they are doing what they are supposed to do and that they are authored in a consistent manner. Unit and integration testing validates the recipes in cookbooks. Syntax testing—often called linting—validates the quality of the code itself. The following tools are popular tools used for testing Chef recipes: Test Kitchen, ChefSpec, and Foodcritic. |
Nodes
A node is any machine—physical, virtual, cloud, network device, etc.—that is under management by Chef.
Node Types
The types of nodes that can be managed by Chef include, but are not limited to, the following:
| Node Type | Description |
|---|---|
|
|
A physical node is typically a server or a virtual machine, but it can be any active device attached to a network that is capable of sending, receiving, and forwarding information over a communications channel. In other words, a physical node is any active device attached to a network that can run a chef-client and also allow that chef-client to communicate with a Chef server. |
|
|
A cloud-based node is hosted in an external cloud-based service, such as Amazon Web Services (AWS), OpenStack, Rackspace, Google Compute Engine, or Microsoft Azure. Plugins are available for knife that provide support for external cloud-based services. knife can use these plugins to create instances on cloud-based services. Once created, the chef-client can be used to deploy, configure, and maintain those instances. |
|
|
A virtual node is a machine that runs only as a software implementation, but otherwise behaves much like a physical machine. |
|
|
A network node is any networking device—a switch, a router—that is being managed by a chef-client, such as networking devices by Juniper Networks, Arista, Cisco, and F5. Use Chef to automate common network configurations, such as physical and logical Ethernet link properties and VLANs, on these devices. |
|
|
Containers are an approach to virtualization that allows a single operating system to host many working configurations, where each working configuration—a container—is assigned a single responsibility that is isolated from all other responsibilities. Containers are popular as a way to manage distributed and scalable applications and services. |
Chef on Nodes
The key components of nodes that are under management by Chef include:
| Component | Description |
|---|---|
|
|
A chef-client is an agent that runs locally on every node that is under management by Chef. When a chef-client is run, it will perform all of the steps that are required to bring the node into the expected state, including:
RSA public key-pairs are used to authenticate the chef-client with the Chef server every time a chef-client needs access to data that is stored on the Chef server. This prevents any node from accessing data that it shouldn’t and it ensures that only nodes that are properly registered with the Chef server can be managed. |
|
|
Ohai is a tool that is used to collect system configuration data, which is provided to the chef-client for use within cookbooks. Ohai is run by the chef-client at the beginning of every Chef run to determine system state. Ohai includes many built-in plugins to detect common configuration details as well as a plugin model for writing custom plugins. The types of attributes Ohai collects include but are not limited to:
Attributes that are collected by Ohai are automatic level attributes, in that these attributes are used by the chef-client to ensure that these attributes remain unchanged after the chef-client is done configuring the node. |
The Chef Server
The Chef server acts as a hub for configuration data. The Chef server stores cookbooks, the policies that are applied to nodes, and metadata that describes each registered node that is being managed by the chef-client. Nodes use the chef-client to ask the Chef server for configuration details, such as recipes, templates, and file distributions. The chef-client then does as much of the configuration work as possible on the nodes themselves (and not on the Chef server). This scalable approach distributes the configuration effort throughout the organization.
| Feature | Description |
|---|---|
|
|
Search indexes allow queries to be made for any type of data that is indexed by the Chef server, including data bags (and data bag items), environments, nodes, and roles. A defined query syntax is used to support search patterns like exact, wildcard, range, and fuzzy. A search is a full-text query that can be done from several locations, including from within a recipe, by using the search subcommand in knife, the search method in the Recipe DSL, the search box in the Chef management console, and by using the /search or /search/INDEX endpoints in the Chef server API. The search engine is based on Apache Solr and is run from the Chef server. |
|
|
Chef management console is a web-based interface for the Chef server that provides users a way to manage the following objects:
|
|
|
A data bag is a global variable that is stored as JSON data and is accessible from a Chef server. A data bag is indexed for searching and can be loaded by a recipe or accessed during a search. |
|
|
Policy defines how business and operational requirements, processes, and production workflows map to objects that are stored on the Chef server. Policy objects on the Chef server include roles, environments, and cookbook versions. |
Policy
Policy maps business and operational requirements, process, and workflow to settings and objects stored on the Chef server:
- Roles define server types, such as “web server” or “database server”
- Environments define process, such as “dev”, “staging”, or “production”
- Certain types of data—passwords, user account data, and other sensitive items—can be placed in data bags, which are located in a secure sub-area on the Chef server that can only be accessed by nodes that authenticate to the Chef server with the correct SSL certificates
- The cookbooks (and cookbook versions) in which organization-specific configuration policies are maintained
Some important aspects of policy include:
| Feature | Description |
|---|---|
|
|
A role is a way to define certain patterns and processes that exist across nodes in an organization as belonging to a single job function. Each role consists of zero (or more) attributes and a run-list. Each node can have zero (or more) roles assigned to it. When a role is run against a node, the configuration details of that node are compared against the attributes of the role, and then the contents of that role’s run-list are applied to the node’s configuration details. When a chef-client runs, it merges its own attributes and run-lists with those contained within each assigned role. |
|
|
An environment is a way to map an organization’s real-life workflow to what can be configured and managed when using Chef server. Every organization begins with a single environment called the _default environment, which cannot be modified (or deleted). Additional environments can be created to reflect each organization’s patterns and workflow. For example, creating production, staging, testing, and developmentenvironments. Generally, an environment is also associated with one (or more) cookbook versions. |
|
|
A cookbook version represents a set of functionality that is different from the cookbook on which it is based. A version may exist for many reasons, such as ensuring the correct use of a third-party component, updating a bug fix, or adding an improvement. A cookbook version is defined using syntax and operators, may be associated with environments, cookbook metadata, and/or run-lists, and may be frozen (to prevent unwanted updates from being made). A cookbook version is maintained just like a cookbook, with regard to source control, uploading it to the Chef server, and how the chef-client applies that cookbook when configuring nodes. |
|
|
A run-list defines all of the information necessary for Chef to configure a node into the desired state. A run-list is:
|
Chef: Services
The service-list subcommand is used to display a list of all available services. A service that is enabled is labeled with an asterisk (*).
This subcommand has the following syntax:
$ chef-server-ctl service-list
The output will be as follows:
bookshelf*
nginx*
oc_bifrost*
oc_id*
opscode-chef-mover*
opscode-erchef*
opscode-expander*
opscode-pushy-server*
opscode-reporting*
opscode-solr4*
postgresql*
rabbitmq*
redis_lb*
bifrost
The oc_bifrost service ensures that every request to view or manage objects stored on the Chef server is authorized.
status
To view the status for the service:
$ chef-server-ctl status bifrost
to return something like:
$ run: bifrost: (pid 1234) 123456s; run: log: (pid 5678) 789012s
restart
To restart the service:
$ chef-server-ctl restart bifrost
to return something like:
$ ok: run: bifrost: (pid 1234) 1234s
run once
To run the service, but not restart it (if the service fails):
$ chef-server-ctl once bifrost
tail
To follow the logs for the service:
$ chef-server-ctl tail bifrost
bookshelf
The bookshelf service is an Amazon Simple Storage Service (S3)-compatible service that is used to store cookbooks, including all of the files—recipes, templates, and so on—that are associated with each cookbook.
keepalived
The keepalived service manages the virtual IP address (VIP) between the backend machines in a high availability topology that uses DRBD.
nginx
The nginx service is used to manage traffic to the Chef server, including virtual hosts for internal and external API request/response routing, external add-on request routing, and routing between front- and back-end components.
opscode-erchef
The opscode-erchef service is an Erlang-based service that is used to handle Chef server API requests to the following areas within the Chef server:
- Cookbooks
- Data bags
- Environments
- Nodes
- Roles
- Sandboxes
- Search
opscode-expander
The opscode-expander service is used to process data (pulled from the rabbitmq service’s message queue) so that it can be properly indexed by the opscode-solr4 service.
opscode-solr4
The opscode-solr4 service is used to create the search indexes used for searching objects like nodes, data bags, and cookbooks. (This service ensures timely search results via the Chef server API; data that is used by the Chef platform is stored in PostgreSQL.)
postgresql
The postgresql service is used to store node, object, and user data.
rabbitmq
The rabbitmq service is used to provide the message queue that is used by the Chef server to get search data to Apache Solr so that it can be indexed for search. When Chef Analytics is configured, the rabbitmq service is also used to send data from the Chef server to the Chef Analytics server.
redis
Key-value store used in conjunction with Nginx to route requests and populate request data used by the Chef server.
To stop all chef services execute the following:
chef-server-ctl stop bookshelf
chef-server-ctl stop nginx
chef-server-ctl stop oc_bifrost
chef-server-ctl stop oc_id
chef-server-ctl stop opscode-chef-mover
chef-server-ctl stop opscode-erchef
chef-server-ctl stop opscode-expander
chef-server-ctl stop opscode-pushy-server
chef-server-ctl stop opscode-reporting
chef-server-ctl stop opscode-solr4
chef-server-ctl stop postgresql
chef-server-ctl stop rabbitmq
chef-server-ctl stop redis_lb
Chef: ChefDK


- Create a linux machine, login into it and execute the following command:
curl -s https://omnitruck.chef.io/install.sh | sudo bash -s — -P chefdk - Now we need to change the default ruby to point it to the chef ruby and not the system ruby. Execute the following command for it.
echo ‘eval “$(chef shell-init bash)”‘ >> ~/.bash_profileNote:evalis part of POSIX. Its an interface which can be a shell built-in.Its described in the “POSIX Programmer’s Manual”: http://www.unix.com/man-page/posix/1posix/eval/eval - construct command by concatenating argumentsIt will take an argument and construct a command of it, which will be executed by the shell. This is the example of the manpage:
1) foo=10 x=foo 2) y='$'$x 3) echo $y 4) $foo 5) eval y='$'$x 6) echo $y 7) 10- In the first line you define
$foowith the value'10'and$xwith the value'foo'. - Now define
$y, which consists of the string'$foo'. The dollar sign must be escaped with'$'. - To check the result,
echo $y. - The result will be the string
'$foo' - Now we repeat the assignment with
eval. It will first evaluate$xto the string'foo'. Now we have the statementy=$foowhich will get evaluated toy=10. - The result of
echo $yis now the value'10'.
This is a common function in many languages, e.g. Perl and JavaScript.
- In the first line you define
- The chef shell-init bash command ouputs as follows:
export PATH=”/opt/chefdk/bin:/root/.chefdk/gem/ruby/2.4.0/bin:/opt/chefdk/embedded/bin:/sbin:/bin:/usr/sbin:/usr/bin:/opt/chefdk/gitbin”
export GEM_ROOT=”/opt/chefdk/embedded/lib/ruby/gems/2.4.0″
export GEM_HOME=”/root/.chefdk/gem/ruby/2.4.0″
export GEM_PATH=”/root/.chefdk/gem/ruby/2.4.0:/opt/chefdk/embedded/lib/ruby/gems/2.4.0″
_chef_comp() {
local COMMANDS=”exec env gem generate shell-init install update push push-archive show-policy diff provision export clean-policy-revisions clean-policy-cookbooks delete-policy-group delete-policy undelete verify”
COMPREPLY=($(compgen -W “$COMMANDS” — ${COMP_WORDS[COMP_CWORD]} ))
}
complete -F _chef_comp chef
Thus eval command will execute the above arguments as a command and set all the necessary variables. - We then add these variables in .bash_profile file so that it is loaded for all the shell termnals. So load the .bash_profile by executing source ~/.bash_profile
Check by executing which chef and which ruby - Execute chef -v to check chef version. Output will be as follows:
chef-client version: 13.4.19
delivery version: master (73ebb72a6c42b3d2ff5370c476be800fee7e5427)
berks version: 6.3.1
kitchen version: 1.17.0
inspec version: 1.36.1 - Then execute the following:
yum install -y git yum-utils - Then configure git name and email:
git config –global user.name “Arati”
git config –global user.email “aratik711@gmail.com”
git config –global core.editor vi
git config –global color.ui auto - Add the docker repo with the following command:
yum-config-manager –add-repo https://download.docker.com/linux/centos/docker-ce.repo
yum makecache fast - Install docker container Engine with the following command:
yum -y install docker-ce - Enable and start the docker service:
systemctl enable docker
systemctl start docker - If you are not using the root user you will need to add your user to the docker group to execute docker commands:
sudo usermod -aG docker $USER - So as to avoid the systemd issue that occurs in the containers we will have to stop and disable the getty@tty1 service.
A getty is the generic name for a program which manages a terminal line and its connected terminal. Its purpose is to protect the system from unauthorized access. Generally, each getty process is started by systemd and manages a single terminal line.
sudo systemctl stop getty@tty1.service
sudo systemctl mask getty@tty1.service
Create a test network:
docker network create –subnet=10.1.1.0/24 testnet - Then install docker driver so that the test-kitchen can use it:
gem install kitchen-docker
You might get an error as follows:Fetching: mixlib-shellout-2.3.2.gem (100%) ERROR: Error installing kitchen-docker: mixlib-shellout requires Ruby version >= 2.2.Then install the individual dependencies with the following commands:
gem install mixlib-shellout -v 2.2.7

gem install test-kitchen -v 1.16.0

gem install kitchen-docker
Chef: Test Kitchen


- Install docker with the following command:
yum install docker
systemctl start docker - Then we need to install the kitchen-docker ruby gem.
chef gem install kitchen-docker - Create a cookbook:
chef generate cookbook my_cookbook - Edit the .kitchen.yml file in the generated cookbook.
Change the driver name from vagrant to docker and delete the line
– name: centos-7
Save and close. - Then execute kitchen converge. This command will create a docker container for us and put all the settings in place.
The output will be something as follows:
Synchronizing Cookbooks:
– my_cookbook (0.1.0)
Installing Cookbook Gems:
Compiling Cookbooks…
Converging 0 resourcesRunning handlers:
Running handlers complete
Chef Client finished, 0/0 resources updated in 18 seconds
Finished converging <default-ubuntu-1604> (7m3.52s). - Then run kitchen list
The output will be something as follows:
Instance Driver Provisioner Verifier Transport Last Action Last Error
default-ubuntu-1604 Docker ChefZero Inspec Ssh Converged <None> - Now we need to verify whether the test was successful or not. Execute
kitchen verify
—–> Starting Kitchen (v1.17.0)
—–> Setting up <default-ubuntu-1604>…
Finished setting up <default-ubuntu-1604> (0m0.00s).
—–> Verifying <default-ubuntu-1604>…
Loaded tests from test/smoke/defaultProfile: tests from test/smoke/default
Version: (not specified)
Target: ssh://kitchen@localhost:32768User root
↺
Port 80
↺Test Summary: 0 successful, 0 failures, 2 skipped
Finished verifying <default-ubuntu-1604> (0m3.62s).
—–> Kitchen is finished. (0m6.58s) - Edit the file vi test/smoke/default/default_test.rb
Add the following lines to it:
describe package(‘cowsay’) do
it {should be_installed }
end - Then run kitchen verify. This test should return failed:
>>>>>> ——Exception——-
>>>>>> Class: Kitchen::ActionFailed
>>>>>> Message: 1 actions failed.
>>>>>> Verify failed on instance <default-ubuntu-1604>. Please see .kitchen/logs/default-ubuntu-1604.log for more details
>>>>>> ———————-
>>>>>> Please see .kitchen/logs/kitchen.log for more details
>>>>>> Also try running `kitchen diagnose –all` for configuration - Edit the following file vi recipes/default.rb
Add the line package ‘cowsay’
Then execute kitchen converge and then kitchen test.
The output should be something like
System Package
✔ cowsay should be installedTest Summary: 1 successful, 0 failures, 1 skipped
Chef: Roles and Environments
- Bootstrap another node with your chef-server.
If you get the following error:
Failed to read the private key /etc/chef/validation.pem: # In the same error logs you will see a line:
Delete your validation key in order to use your user credentials instead
Please check that you don’t have any validation.pem key in /etc/chef, if any, then delete it.
You can verify by executing one of the following:
knife client list
knife node show chef-node2 - Create a new cookbook postgresql:
chef generate cookbook cookbooks/postgresql - Edit cookbooks/postgresql/recipes/default.rb
package 'postgresql-server' do notifies :run, 'execute[postgresql-init]' end execute 'postgresql-init' do command 'postgresql-setup initdb' action :nothing end service 'postgresql' do action [:enable, :start] end &amp;lt;span data-mce-type="bookmark" id="mce_SELREST_start" data-mce-style="overflow:hidden;line-height:0" style="overflow:hidden;line-height:0" &amp;gt;&amp;amp;#65279;&amp;lt;/span&amp;gt;The notifies :run, ‘execute[postgresql-init]’ will send a run signal to the execute task and execute the init command only when the package is installed.
Check it with foodcritic and then push it to the git repo. 


- Login to your chef-manage UI and select your node, click on “Edit run list” and remove all the recipes associated with it.
- In your chef-workstation we will now create a role. Execute the following command:
knife role create web
You will get the following error:
ERROR: RuntimeError: Please set EDITOR environment variable
We will have to set a default editor. Here we’ll use vi.
Execute the following commands:
vi ~/.bashrc
export EDITOR= $(which vi)
source ~/.bashrc
Then execute the create role command.
This will openup the role file in vi editor with the following content:{ "name": "web", "description": "", "json_class": "Chef::Role", "default_attributes": { }, "override_attributes": { }, "chef_type": "role", "run_list": [ ], "env_run_lists": { } } &lt;span data-mce-type="bookmark" id="mce_SELREST_start" data-mce-style="overflow:hidden;line-height:0" style="overflow:hidden;line-height:0" &gt;&amp;#65279;&lt;/span&gt; - Add the following in the run list section:
“recipe[apache]”,
“recipe[apache::websites]”,
“recipe[apache::motd]”
Save and close. - You can check the run list for your role in your chef-manage UI in policies section in roles.
- You can also edit the existing role with command:
knife role edit web - You can add the role to the node with the following command:
knife node run_list set chef-node2 “role[web]” - You can check the newly added role with the following command:
knife node show chef-node2 - Then we need to issue the chef-client command from the workstation for all the nodes having role “web”.
knife ssh “role:web” “sudo chef-client” -x gslab -P
If you get the following error:
WARNING: Failed to connect to chef-node2.local — SocketError: getaddrinfo: Name or service not known.
Then add the host chef-node2.local to /etc/hosts file. Then execute the knife ssh command again. - Then upload the postgresql cookbook:
knife cookbook upload postgresql - Create role database:
knife create role database - The add the role to a node:
knife node run_list set chef-node “role[postgresql]” - Then edit the postgresql default.rb recipe. Edit the line to match the following:
notifies :run, ‘execute[postgresql-init]’, :immediately
Then upload the cookbook: knife cookbook upload postgresql - Then execute the following command:
knife ssh “role:database” “sudo chef-client” -x gslab -P
Search
- Edit the websites.rb recipe in the apache cookbook.
Add the following after the file section in it:webnodes = search("node", "role:web") webnodes.each do |node| puts node end <span data-mce-type="bookmark" id="mce_SELREST_start" data-mce-style="overflow:hidden;line-height:0" style="overflow:hidden;line-height:0" ></span> - Upload the cookbook:
knife cookbook upload apache - Then execute chef-client on chef-node2 you will see an output as below. In the output you can see the hostname added:
Starting Chef Client, version 13.3.42
resolving cookbooks for run list: [“apache”, “apache::websites”, “apache::motd”]
Synchronizing Cookbooks:
– apache (0.2.1)
Installing Cookbook Gems:
Compiling Cookbooks…
node[chef-node2]
Converging 4 resources
Recipe: apache::default
* yum_package[apache2] action install (up to date)
* service[apache2] action start (up to date)
* service[apache2] action enable (up to date)
Recipe: apache::websites
* file[default www] action create (up to date)
Recipe: apache::motd
* file[/etc/motd] action create (up to date)Running handlers:
Running handlers complete
Chef Client finished, 0/5 resources updated in 08 seconds
Environments


- Now edit the apache metadata.rb file and change the version to 1.0. Then edit the websites.rb, change the content to “Hello World v1.0”. then upload the apache cookbook.
- Again edit the apache metadata.rb file and change the version to 2.0. Then edit the websites.rb, change the content to “Hello World v2.0”. then upload the apache cookbook.
- Then login to the chef manage UI and then in the policy section -> Environment -> Create.
Add the name as “staging” and some description. click on Next. Then in the constraints section select the name apache, Operator as “=”, Version as 2.0.0.
Click on Add then Click on Create Environment.
Add the name as “production” and some description. click on Next. Then in the constraints section select the name apache, Operator as “=”, Version as 1.0.0.
Click on Add. Click on Create Environment. - Then on the Nodes page click on chef-node Edit the environment to be Production. Save it.
- Then click on the chef-node2 and change the environment to be staging. Save it.
- Then execute chef-client on both nodes. You should see that the chef-node is executing the apache version 2.0.0 (Production) and chef-node2 is executing the apache version 1.0.0 (Staging).
- You can hit the IP address of both the servers in the browser and see that the webpage show different result.
- Thus we have separated the cookbooks and nodes as per environemt.
Chef: Nodes and Search


-
- Now login to your chef-node/chef-client and type ohai. Ohai is automatically bootstraped when we install chef.
You will get an output similar to below:
……
“OPEN_MAX”: 1024,
“PAGESIZE”: 4096,
“PAGE_SIZE”: 4096,
“PASS_MAX”: 8192,
“PTHREAD_DESTRUCTOR_ITERATIONS”: 4,
“PTHREAD_KEYS_MAX”: 1024,
“PTHREAD_STACK_MIN”: 16384,
“PTHREAD_THREADS_MAX”: null,
“SCHAR_MAX”: 127,
“SCHAR_MIN”: -128,
“SHRT_MAX”: 32767,
“SHRT_MIN”: -32768,
“SSIZE_MAX”: 32767,
“TTY_NAME_MAX”: 32,
“TZNAME_MAX”: 6,
“UCHAR_MAX”: 255,
“UINT_MAX”: 4294967295,
“UIO_MAXIOV”: 1024,
“ULONG_MAX”: 18446744073709551615,
“USHRT_MAX”: 65535,
“WORD_BIT”: 32,
“_AVPHYS_PAGES”: 768366,
“_NPROCESSORS_CONF”: 2,
“_NPROCESSORS_ONLN”: 2,
“_PHYS_PAGES”: 970577,
“_POSIX_ARG_MAX”: 2097152,
“_POSIX_ASYNCHRONOUS_IO”: 200809,
“_POSIX_CHILD_MAX”: 15019,
“_POSIX_FSYNC”: 200809,
“_POSIX_JOB_CONTROL”: 1,
“_POSIX_MAPPED_FILES”: 200809,
“_POSIX_MEMLOCK”: 200809,
“_POSIX_MEMLOCK_RANGE”: 200809,
“_POSIX_MEMORY_PROTECTION”: 200809,
“_POSIX_MESSAGE_PASSING”: 200809,
“_POSIX_NGROUPS_MAX”: 65536,
“_POSIX_OPEN_MAX”: 1024,
“_POSIX_PII”: null,
“_POSIX_PII_INTERNET”: null,
“_POSIX_PII_INTERNET_DGRAM”: null,
“_POSIX_PII_INTERNET_STREAM”: null,
“_POSIX_PII_OSI”: null,
“_POSIX_PII_OSI_CLTS”: null,
“_POSIX_PII_OSI_COTS”: null,
“_POSIX_PII_OSI_M”: null,
“_POSIX_PII_SOCKET”: null,
“_POSIX_PII_XTI”: null,
“_POSIX_POLL”: null,
“_POSIX_PRIORITIZED_IO”: 200809,
“_POSIX_PRIORITY_SCHEDULING”: 200809,
“_POSIX_REALTIME_SIGNALS”: 200809,
“_POSIX_SAVED_IDS”: 1,
“_POSIX_SELECT”: null,
“_POSIX_SEMAPHORES”: 200809,
“_POSIX_SHARED_MEMORY_OBJECTS”: 200809,
“_POSIX_SSIZE_MAX”: 32767,
“_POSIX_STREAM_MAX”: 16,
“_POSIX_SYNCHRONIZED_IO”: 200809,
“_POSIX_THREADS”: 200809,
“_POSIX_THREAD_ATTR_STACKADDR”: 200809,
“_POSIX_THREAD_ATTR_STACKSIZE”: 200809,
“_POSIX_THREAD_PRIORITY_SCHEDULING”: 200809,
“_POSIX_THREAD_PRIO_INHERIT”: 200809,
“_POSIX_THREAD_PRIO_PROTECT”: 200809,
“_POSIX_THREAD_ROBUST_PRIO_INHERIT”: null,
“_POSIX_THREAD_ROBUST_PRIO_PROTECT”: null,
“_POSIX_THREAD_PROCESS_SHARED”: 200809,
“_POSIX_THREAD_SAFE_FUNCTIONS”: 200809,
“_POSIX_TIMERS”: 200809,
“TIMER_MAX”: null,
“_POSIX_TZNAME_MAX”: 6,
“_POSIX_VERSION”: 200809,
“_T_IOV_MAX”: null,
“_XOPEN_CRYPT”: 1,
“_XOPEN_ENH_I18N”: 1,
“_XOPEN_LEGACY”: 1,
“_XOPEN_REALTIME”: 1,
“_XOPEN_REALTIME_THREADS”: 1,
“_XOPEN_SHM”: 1,
“_XOPEN_UNIX”: 1,
“_XOPEN_VERSION”: 700,
“_XOPEN_XCU_VERSION”: 4,
“_XOPEN_XPG2”: 1,
“_XOPEN_XPG3”: 1,
“_XOPEN_XPG4”: 1,
“BC_BASE_MAX”: 99,
“BC_DIM_MAX”: 2048,
“BC_SCALE_MAX”: 99,
“BC_STRING_MAX”: 1000,
“CHARCLASS_NAME_MAX”: 2048,
“COLL_WEIGHTS_MAX”: 255,
“EQUIV_CLASS_MAX”: null,
“EXPR_NEST_MAX”: 32,
“LINE_MAX”: 2048,
“POSIX2_BC_BASE_MAX”: 99,
“POSIX2_BC_DIM_MAX”: 2048,
“POSIX2_BC_SCALE_MAX”: 99,
“POSIX2_BC_STRING_MAX”: 1000,
“POSIX2_CHAR_TERM”: 200809,
“POSIX2_COLL_WEIGHTS_MAX”: 255,
“POSIX2_C_BIND”: 200809,
“POSIX2_C_DEV”: 200809,
“POSIX2_C_VERSION”: null,
“POSIX2_EXPR_NEST_MAX”: 32,
“POSIX2_FORT_DEV”: null,
“POSIX2_FORT_RUN”: null,
“_POSIX2_LINE_MAX”: 2048,
“POSIX2_LINE_MAX”: 2048,
“POSIX2_LOCALEDEF”: 200809,
“POSIX2_RE_DUP_MAX”: 32767,
“POSIX2_SW_DEV”: 200809,
“POSIX2_UPE”: null,
“POSIX2_VERSION”: 200809,
“RE_DUP_MAX”: 32767,
“PATH”: “/usr/bin”,
“CS_PATH”: “/usr/bin”,
“LFS_CFLAGS”: null,
“LFS_LDFLAGS”: null,
“LFS_LIBS”: null,
“LFS_LINTFLAGS”: null,
“LFS64_CFLAGS”: “-D_LARGEFILE64_SOURCE”,
“LFS64_LDFLAGS”: null,
“LFS64_LIBS”: null,
“LFS64_LINTFLAGS”: “-D_LARGEFILE64_SOURCE”,
“_XBS5_WIDTH_RESTRICTED_ENVS”: “XBS5_LP64_OFF64”,
“XBS5_WIDTH_RESTRICTED_ENVS”: “XBS5_LP64_OFF64”,
“_XBS5_ILP32_OFF32”: null,
“XBS5_ILP32_OFF32_CFLAGS”: null,
“XBS5_ILP32_OFF32_LDFLAGS”: null,
“XBS5_ILP32_OFF32_LIBS”: null,
“XBS5_ILP32_OFF32_LINTFLAGS”: null,
“_XBS5_ILP32_OFFBIG”: null,
“XBS5_ILP32_OFFBIG_CFLAGS”: null,
“XBS5_ILP32_OFFBIG_LDFLAGS”: null,
“XBS5_ILP32_OFFBIG_LIBS”: null,
“XBS5_ILP32_OFFBIG_LINTFLAGS”: null,
“_XBS5_LP64_OFF64”: 1,
“XBS5_LP64_OFF64_CFLAGS”: “-m64”,
“XBS5_LP64_OFF64_LDFLAGS”: “-m64”,
“XBS5_LP64_OFF64_LIBS”: null,
“XBS5_LP64_OFF64_LINTFLAGS”: null,
“_XBS5_LPBIG_OFFBIG”: null,
“XBS5_LPBIG_OFFBIG_CFLAGS”: null,
“XBS5_LPBIG_OFFBIG_LDFLAGS”: null,
“XBS5_LPBIG_OFFBIG_LIBS”: null,
“XBS5_LPBIG_OFFBIG_LINTFLAGS”: null,
“_POSIX_V6_ILP32_OFF32”: null,
“POSIX_V6_ILP32_OFF32_CFLAGS”: null,
“POSIX_V6_ILP32_OFF32_LDFLAGS”: null,
“POSIX_V6_ILP32_OFF32_LIBS”: null,
“POSIX_V6_ILP32_OFF32_LINTFLAGS”: null,
“_POSIX_V6_WIDTH_RESTRICTED_ENVS”: “POSIX_V6_LP64_OFF64”,
“POSIX_V6_WIDTH_RESTRICTED_ENVS”: “POSIX_V6_LP64_OFF64”,
“_POSIX_V6_ILP32_OFFBIG”: null,
“POSIX_V6_ILP32_OFFBIG_CFLAGS”: null,
“POSIX_V6_ILP32_OFFBIG_LDFLAGS”: null,
“POSIX_V6_ILP32_OFFBIG_LIBS”: null,
“POSIX_V6_ILP32_OFFBIG_LINTFLAGS”: null,
“_POSIX_V6_LP64_OFF64”: 1,
“POSIX_V6_LP64_OFF64_CFLAGS”: “-m64”,
“POSIX_V6_LP64_OFF64_LDFLAGS”: “-m64”,
“POSIX_V6_LP64_OFF64_LIBS”: null,
“POSIX_V6_LP64_OFF64_LINTFLAGS”: null,
“_POSIX_V6_LPBIG_OFFBIG”: null,
“POSIX_V6_LPBIG_OFFBIG_CFLAGS”: null,
“POSIX_V6_LPBIG_OFFBIG_LDFLAGS”: null,
“POSIX_V6_LPBIG_OFFBIG_LIBS”: null,
“POSIX_V6_LPBIG_OFFBIG_LINTFLAGS”: null,
“_POSIX_V7_ILP32_OFF32”: null,
“POSIX_V7_ILP32_OFF32_CFLAGS”: null,
“POSIX_V7_ILP32_OFF32_LDFLAGS”: null,
“POSIX_V7_ILP32_OFF32_LIBS”: null,
“POSIX_V7_ILP32_OFF32_LINTFLAGS”: null,
“_POSIX_V7_WIDTH_RESTRICTED_ENVS”: “POSIX_V7_LP64_OFF64”,
“POSIX_V7_WIDTH_RESTRICTED_ENVS”: “POSIX_V7_LP64_OFF64”,
“_POSIX_V7_ILP32_OFFBIG”: null,
“POSIX_V7_ILP32_OFFBIG_CFLAGS”: null,
“POSIX_V7_ILP32_OFFBIG_LDFLAGS”: null,
“POSIX_V7_ILP32_OFFBIG_LIBS”: null,
“POSIX_V7_ILP32_OFFBIG_LINTFLAGS”: null,
“_POSIX_V7_LP64_OFF64”: 1,
“POSIX_V7_LP64_OFF64_CFLAGS”: “-m64”,
“POSIX_V7_LP64_OFF64_LDFLAGS”: “-m64”,
“POSIX_V7_LP64_OFF64_LIBS”: null,
“POSIX_V7_LP64_OFF64_LINTFLAGS”: null,
“_POSIX_V7_LPBIG_OFFBIG”: null,
“POSIX_V7_LPBIG_OFFBIG_CFLAGS”: null,
“POSIX_V7_LPBIG_OFFBIG_LDFLAGS”: null,
“POSIX_V7_LPBIG_OFFBIG_LIBS”: null,
“POSIX_V7_LPBIG_OFFBIG_LINTFLAGS”: null,
“_POSIX_ADVISORY_INFO”: 200809,
“_POSIX_BARRIERS”: 200809,
“_POSIX_BASE”: null,
“_POSIX_C_LANG_SUPPORT”: null,
“_POSIX_C_LANG_SUPPORT_R”: null,
“_POSIX_CLOCK_SELECTION”: 200809,
“_POSIX_CPUTIME”: 200809,
“_POSIX_THREAD_CPUTIME”: 200809,
“_POSIX_DEVICE_SPECIFIC”: null,
“_POSIX_DEVICE_SPECIFIC_R”: null,
“_POSIX_FD_MGMT”: null,
“_POSIX_FIFO”: null,
“_POSIX_PIPE”: null,
“_POSIX_FILE_ATTRIBUTES”: null,
“_POSIX_FILE_LOCKING”: null,
“_POSIX_FILE_SYSTEM”: null,
“_POSIX_MONOTONIC_CLOCK”: 200809,
“_POSIX_MULTI_PROCESS”: null,
“_POSIX_SINGLE_PROCESS”: null,
“_POSIX_NETWORKING”: null,
“_POSIX_READER_WRITER_LOCKS”: 200809,
“_POSIX_SPIN_LOCKS”: 200809,
“_POSIX_REGEXP”: 1,
“_REGEX_VERSION”: null,
“_POSIX_SHELL”: 1,
“_POSIX_SIGNALS”: null,
“_POSIX_SPAWN”: 200809,
“_POSIX_SPORADIC_SERVER”: null,
“_POSIX_THREAD_SPORADIC_SERVER”: null,
“_POSIX_SYSTEM_DATABASE”: null,
“_POSIX_SYSTEM_DATABASE_R”: null,
“_POSIX_TIMEOUTS”: 200809,
“_POSIX_TYPED_MEMORY_OBJECTS”: null,
“_POSIX_USER_GROUPS”: null,
“_POSIX_USER_GROUPS_R”: null,
“POSIX2_PBS”: null,
“POSIX2_PBS_ACCOUNTING”: null,
“POSIX2_PBS_LOCATE”: null,
“POSIX2_PBS_TRACK”: null,
“POSIX2_PBS_MESSAGE”: null,
“SYMLOOP_MAX”: null,
“STREAM_MAX”: 16,
“AIO_LISTIO_MAX”: null,
“AIO_MAX”: null,
“AIO_PRIO_DELTA_MAX”: 20,
“DELAYTIMER_MAX”: 2147483647,
“HOST_NAME_MAX”: 64,
“LOGIN_NAME_MAX”: 256,
“MQ_OPEN_MAX”: null,
“MQ_PRIO_MAX”: 32768,
“_POSIX_DEVICE_IO”: null,
“_POSIX_TRACE”: null,
“_POSIX_TRACE_EVENT_FILTER”: null,
“_POSIX_TRACE_INHERIT”: null,
“_POSIX_TRACE_LOG”: null,
“RTSIG_MAX”: 32,
“SEM_NSEMS_MAX”: null,
“SEM_VALUE_MAX”: 2147483647,
“SIGQUEUE_MAX”: 15019,
“FILESIZEBITS”: 64,
“POSIX_ALLOC_SIZE_MIN”: 4096,
“POSIX_REC_INCR_XFER_SIZE”: null,
“POSIX_REC_MAX_XFER_SIZE”: null,
“POSIX_REC_MIN_XFER_SIZE”: 4096,
“POSIX_REC_XFER_ALIGN”: 4096,
“SYMLINK_MAX”: null,
“GNU_LIBC_VERSION”: “glibc 2.17”,
“GNU_LIBPTHREAD_VERSION”: “NPTL 2.17”,
“POSIX2_SYMLINKS”: 1,
“LEVEL1_ICACHE_SIZE”: 32768,
“LEVEL1_ICACHE_ASSOC”: 8,
“LEVEL1_ICACHE_LINESIZE”: 64,
“LEVEL1_DCACHE_SIZE”: 32768,
“LEVEL1_DCACHE_ASSOC”: 8,
“LEVEL1_DCACHE_LINESIZE”: 64,
“LEVEL2_CACHE_SIZE”: 2097152,
“LEVEL2_CACHE_ASSOC”: 8,
“LEVEL2_CACHE_LINESIZE”: 64,
“LEVEL3_CACHE_SIZE”: 0,
“LEVEL3_CACHE_ASSOC”: 0,
“LEVEL3_CACHE_LINESIZE”: 0,
“LEVEL4_CACHE_SIZE”: 0,
“LEVEL4_CACHE_ASSOC”: 0,
“LEVEL4_CACHE_LINESIZE”: 0,
“IPV6”: 200809,
“RAW_SOCKETS”: 200809
},
“time”: {
“timezone”: “UTC”
}
}
It gives information about our node. - Suppose if I want to retrieve the ipaddress of node then we can execute the command:
ohai ipaddressOutput will be as follows:
[
“192.168.1.240”
]
We can use these attributes in our code.
ohai hostname
[
“chef-node”
]
ohai | grep ipaddress
“ipaddress”: “192.168.1.240”
ohai cpu
{
“0”: {
“vendor_id”: “GenuineIntel”,
“family”: “6”,
“model”: “61”,
“model_name”: “Intel Core Processor (Broadwell)”,
“stepping”: “2”,
“mhz”: “2095.146”,
“cache_size”: “4096 KB”,
“physical_id”: “0”,
“core_id”: “0”,
“cores”: “1”,
“flags”: [
“fpu”,
“vme”,
“de”,
“pse”,
“tsc”,
“msr”,
“pae”,
“mce”,
“cx8”,
“apic”,
“sep”,
“mtrr”,
“pge”,
“mca”,
“cmov”,
“pat”,
“pse36”,
“clflush”,
“mmx”,
“fxsr”,
“sse”,
“sse2”,
“ss”,
“syscall”,
“nx”,
“pdpe1gb”,
“rdtscp”,
“lm”,
“constant_tsc”,
“rep_good”,
“nopl”,
“eagerfpu”,
“pni”,
“pclmulqdq”,
“vmx”,
“ssse3”,
“fma”,
“cx16”,
“pcid”,
“sse4_1”,
“sse4_2”,
“x2apic”,
“movbe”,
“popcnt”,
“tsc_deadline_timer”,
“aes”,
“xsave”,
“avx”,
“f16c”,
“rdrand”,
“hypervisor”,
“lahf_lm”,
“abm”,
“3dnowprefetch”,
“arat”,
“tpr_shadow”,
“vnmi”,
“flexpriority”,
“ept”,
“vpid”,
“fsgsbase”,
“bmi1”,
“hle”,
“avx2”,
“smep”,
“bmi2”,
“erms”,
“invpcid”,
“rtm”,
“rdseed”,
“adx”,
“smap”,
“xsaveopt”
]
},
“1”: {
“vendor_id”: “GenuineIntel”,
“family”: “6”,
“model”: “61”,
“model_name”: “Intel Core Processor (Broadwell)”,
“stepping”: “2”,
“mhz”: “2095.146”,
“cache_size”: “4096 KB”,
“physical_id”: “1”,
“core_id”: “0”,
“cores”: “1”,
“flags”: [
“fpu”,
“vme”,
“de”,
“pse”,
“tsc”,
“msr”,
“pae”,
“mce”,
“cx8”,
“apic”,
“sep”,
“mtrr”,
“pge”,
“mca”,
“cmov”,
“pat”,
“pse36”,
“clflush”,
“mmx”,
“fxsr”,
“sse”,
“sse2”,
“ss”,
“syscall”,
“nx”,
“pdpe1gb”,
“rdtscp”,
“lm”,
“constant_tsc”,
“rep_good”,
“nopl”,
“eagerfpu”,
“pni”,
“pclmulqdq”,
“vmx”,
“ssse3”,
“fma”,
“cx16”,
“pcid”,
“sse4_1”,
“sse4_2”,
“x2apic”,
“movbe”,
“popcnt”,
“tsc_deadline_timer”,
“aes”,
“xsave”,
“avx”,
“f16c”,
“rdrand”,
“hypervisor”,
“lahf_lm”,
“abm”,
“3dnowprefetch”,
“arat”,
“tpr_shadow”,
“vnmi”,
“flexpriority”,
“ept”,
“vpid”,
“fsgsbase”,
“bmi1”,
“hle”,
“avx2”,
“smep”,
“bmi2”,
“erms”,
“invpcid”,
“rtm”,
“rdseed”,
“adx”,
“smap”,
“xsaveopt”
]
},
“total”: 2,
“real”: 2,
“cores”: 2
}
ohai platform
[
“centos”
]
ohai platform_family[
“rhel”
] - Lets edit the apache cookbook we created in previous post.
Edit default.rbif node['platform_family'] == "rhel" package = "httpd" elsif node['platform_family'] == "debian" package = "apache2" end package 'apache2' do package_name package action :install end service 'apache2' do service_name package action [:start, :enable] end - Now create a recipe motd.rb with the following content:
hostname = node['hostname']
file '/etc/motd' do
        content "Hostname is this #{hostname}"
end
Add the code to git repo. Then upload the cookbook to chef-server. Then add the recipe to the run_list with the command:
knife node run_list add chef-node ‘recipe[motd]’ - Now if you run chef-client then you will get the following error:
Error Resolving Cookbooks for Run List:
================================================================================Missing Cookbooks:
——————
The following cookbooks are required by the client but don’t exist on the server
* motdWe called motd but motd is not a cookbook it is a recipe inside the apache cookbook.
Now go ahead and remove the recipe from run_list.
knife node run_list remove chef-node ‘recipe[motd]’
Then add the recipe as:
knife node run_list add chef-node ‘recipe[apache::motd]’ - Then run the chef-client the motd recipe will be executed. View the contents of /etc/motd you will see the content updated there.
- Now login to your chef-node/chef-client and type ohai. Ohai is automatically bootstraped when we install chef.
Search


Execute the following command to find nodes having platform_family as rhel
knife search ‘platform_family:rhel’
Output:
Environment: _default
FQDN:
IP: 192.168.1.240
Run List: recipe[apache::websites], recipe[apache], recipe[apache::motd]
Roles:
Recipes: apache::websites, apache, apache::default, apache::motd
Platform: centos 7.2.1511
Tags:
Execute the following command to find nodes having recipes:apache
knife search ‘recipes:apache’
To find the recipe websites in cookbook apache:
knife search ‘recipes:apache::websites’
knife search ‘recipes:apache::websites*’
If you want to retrieve a list of hostnames of the nodes which have platform of centos:
knife search ‘platfor?:centos’ -a hostname
With -a we are specifying the attribute we want.
If you want to list all nodes:
knife search ‘*:*’
If you want to search the nodes with role web:
knife search role ‘role:web’
You can also execute the following:
knife search ‘*.*’ -a recipes
Windows: share internet connection over wifi using 2.4GHz instead 5GHz
Go to Your network connections
Control PanelNetwork and InternetNetwork Connections
Select your wifi adapter
- Click on
Properties - Click on
Configure - Go to
Advanced section - Find preferred band and change it to 2.4 GHz
- Find
Channel widthand change it to 20 MHz ..
And Done..
